Call of Duty: Warzone was one of the most anticipated games of 2020. Warzone is a free-to-play Battle royal game developed by Activision. Call of Duty Warzone gave a major competition to PUBG and Fortnite in the battle royal genre and has been a great hit since its release. According to Activision, Warzone sold more than 80 million copies 6 months after the release. Warzone offers everything from great visuals to raytracing technologies all the way to non-stop action. But everything comes at a cost right?
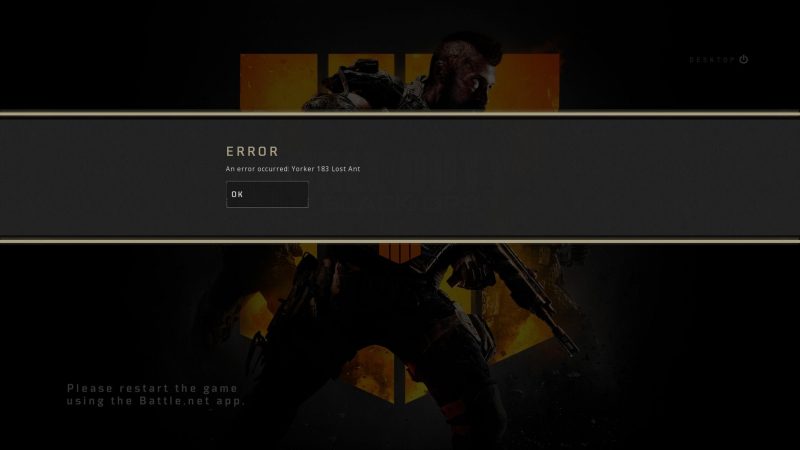
Not a single day goes without the Warzone not being affected by any sort of error or glitch. Over time, there have been several issues with the game. Frequent crashing and freezing, server error, in-game glitches, and connection error have all been a part of Warzone over the year. Although the recent update solved several issues now users are getting a new issue while playing Coldwar Warzone.

Pretty cool name for an error right?. The main reason for this error is the failure to connect with your gaming network. The first thing to try once you get this error is to check Warzone server updates. Maybe the issue could be at the server end. But if the server is fine and you still get this error, try the following fixes to resolve Yorker 183 Ant Lost error in Warzone
Restart the system, then run Warzone again
Before we discuss some technical fixes, we first suggest that you try this enchanting solution of ‘turn it off and on’. On seeing this error, simply turn off the game and restart it. This error might be a simple bug and restarting the game will surely resolve this and you can play Warzone without getting this error further.
For increased optimization, we suggest you reboot your entire system. Many processes running the background alongside the game could be hindering the in-game modules. These unwanted processes could make the memory segment faulty and thus affecting the game and its processes. So at first, we suggest you close the game and the background process via task manager and turn off the system. This will kill the faulty processes, clear the cache and resolve the error.
Tweak QoS and NAT type settings
Since the error is related to a network connection with servers, you also need to check your internet connectivity. The reason you get this error and are unable to connect with the network could be your weak and inadequate connection. Try troubleshooting your internet modem to fix the signal strength and resume strong connectivity. Turn off your router and wait for 5-10 seconds before restarting it. This will help to restore your internet signals. We also prefer to make use of wired connections for online gaming. This provides uninterrupted connectivity and is viable for online gaming.
Apart from this simplistic method, you need to configure advanced router settings as well. The issue could be probably with your internet settings that are causing this error. Try changing your NAT type from strict to moderate or open. NAT type is a gateway linking your IP address to form a connection with Warzone data servers. A strict IP restricts your connection not letting you connect to the servers. To change NAT type to open, go to the router setting menu, look for the UPnP option in router settings and enable it. Now you can reconnect to game servers without any issue and enjoy non-stop action.
Another solution for this issue could be to enable QoS settings. The main purpose of QoS is to prioritize a certain process over your internet connection providing him maximum bandwidth. If you see this error, chances are that Warzone could be set to the least priority. To set the priorities according to your settings, go to the router settings menu, look for QoS and enable it. Under the processes, give Warzone a higher priority and restart the router. These fixes will surely help you to resolve the error.
Switch to Google DNS settings
Your existing DNS settings maybe start to slow down. Due to this, you might not be getting the desired response for the request you are sending over the network. To solve this problem, you need to switch to Google DNS. It will provide you with a fast internet connection as well as a smooth and secure connection that could help you in online gaming. To switch to Google DNS, follow the guide below:
- Select the ‘Network and Internet’ option from Control Panel
- Head to Network and Sharing and select Network Interface.
- Select properties and now check the internet protocol version
- Now change DNS settings and add the following addresses
8.8.8.8 and 8.8.4.4.
- Click the Advanced button and then specify the alternate DNS server addresses and then close it.
Now restart the router and you have now switched to Google DNS. Restart the game to play without any interruption.
Read about How To Fix Disconnected Due to Transmission Error in Warzone
Disable Windows Wirefall or another third-party anti-virus
If you are unable to connect to online game mode, it might be a problem with your Windows firewall. Your game could be either blocked or blacklisted by Windows defender and you are unable to connect to the server as your system might identify it as a risk. One solution is that you need to remove Warzone from the restricted applications list in the Windows firewall or you can disable it before joining the game.
If you are using other anti-virus software, they can also mark the game unsafe and restrict it or Quarantine it. Thus you are unable to play games on go online. You also need to remove the game from the Blacklist menu or disable this anti-virus software before joining the game. It could be done from the settings menu. This will remove any restriction from the game allowing a smooth connection.
If the error is still there, you need to contact the Activision support team and ping your request so that they can look into this matter and solve it quickly through future updates or patches, until then you can wait or play Warzone offline mode.


